Alrighty, so I have been going through all of the photos that I have taken for my blog over the past 8 months or so (EEK!) and I ran across this fun little craft that introduced Alice to the fun of painting "tootsies". I am sure you have seen these before, but it was so fun, I couldn't resist posting it.
The first thing we did was pick our colors. I had selected traditional Thanksgiving/Fall Harvest colors. Alice added the purple. I think the contrast is nice together. Who would have thought that a two year old could open my eyes to a different design option?!?! Anyway, once our colors were selected, we put some on paper plates. As you skim through various painting blogs, you will notice we paint A LOT on paper plates. Plates do not bleed through like paper does...even the "artist" paper bleeds horribly when a child is finger painting. For the actual turkeys, I did use paper because the amount of paint was controlled.
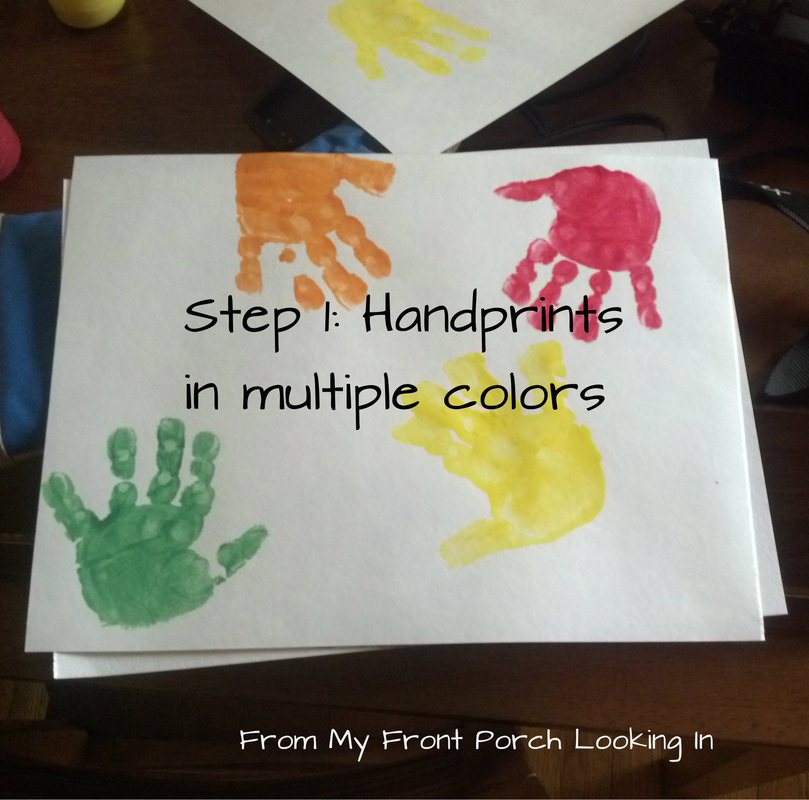
The first step was to paint Alice's hands each of the beautiful colors. Of course, we had to make 4 or 5 different sets for all of the grandparents. Alice really got a kick out of this because it tickled! Every time the brush came into contact with her fingers, she would giggle!
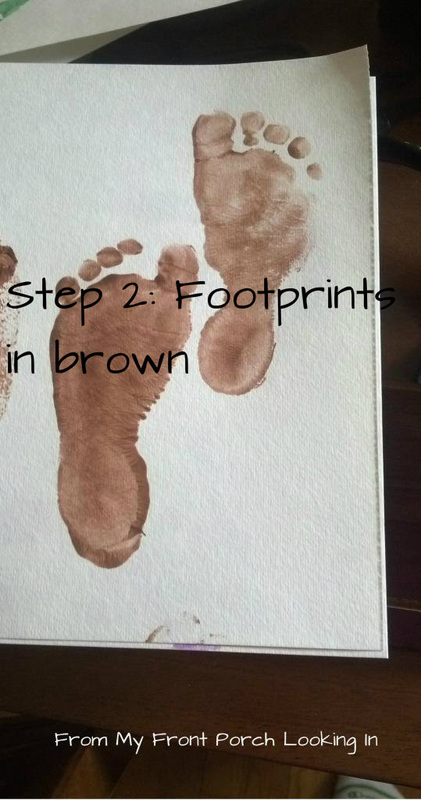
Once all of the hands were done, we took off the socks and got down to the business of painting feet! Well, that really got Alice going! She was laughing so hard my husband had to help me so she didn't get brown paint all over the place. We painted both feet which meant that half of the turkey bodies were lefties and half were righties.
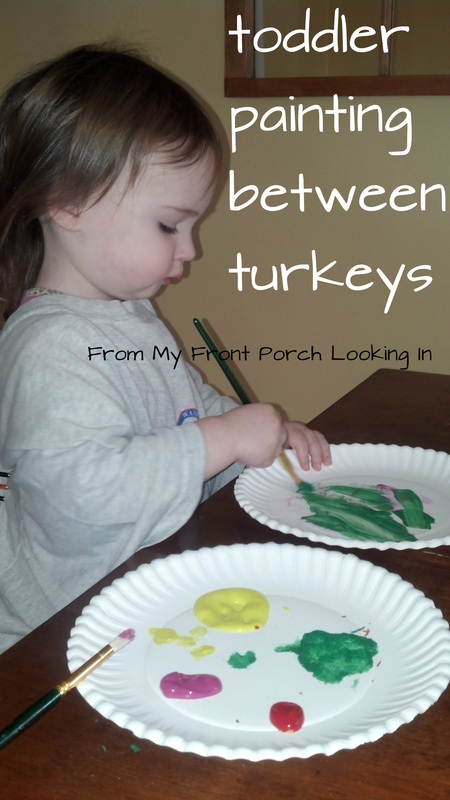
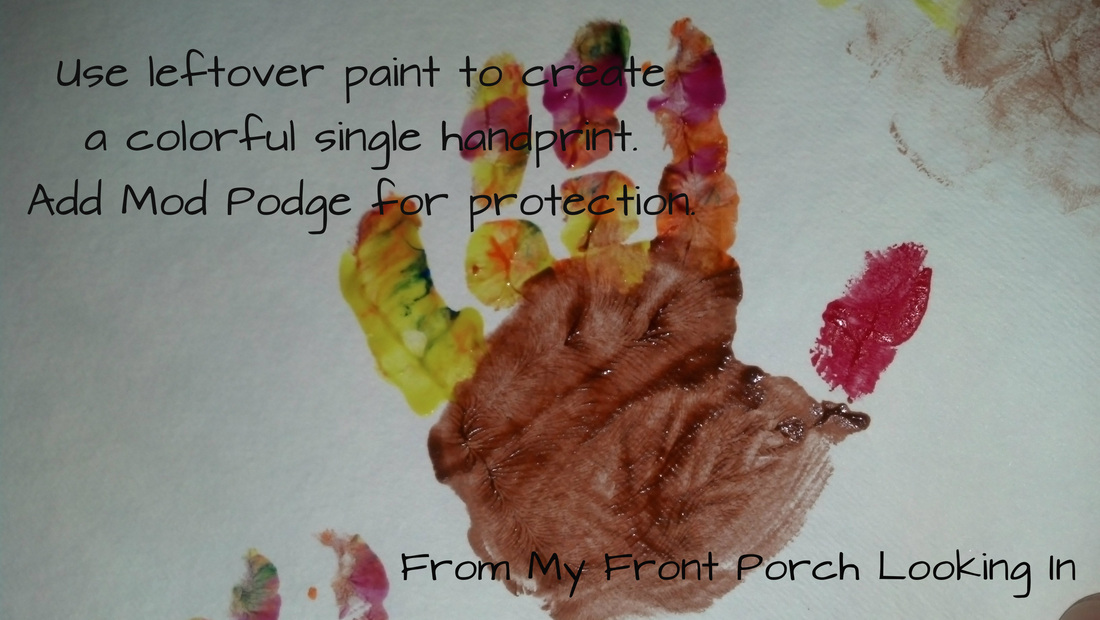
In between turkeys and while the paint dried, Alice got to have some free time to paint whatever she wanted. Then we made a mini turkey with all of the colors. You can see it below. I loved the turkeys made with her feet, but the single hand turkey is probably my favorite because it feels like a better visual of how tiny her hands still are.
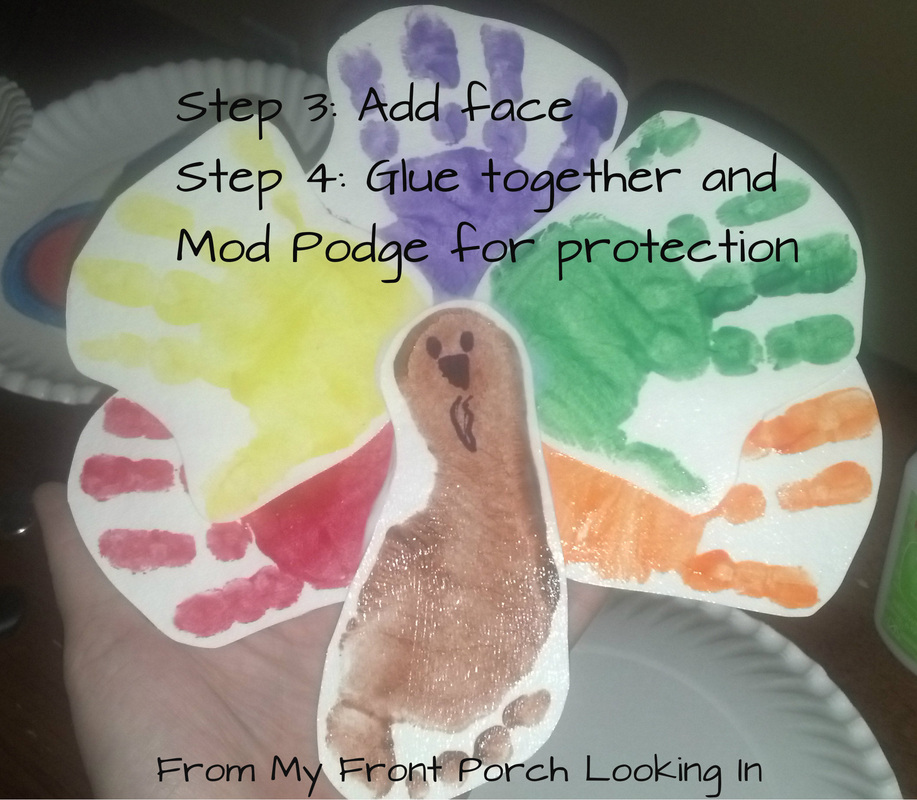
Once the paint dried, I drew a cute little face on the turkey and glued all of the pieces together. On the back, I put Alice's name and the date. Then when the glue was dry, I Mod Podged both sides of the turkey for protection. I used glossy Mod Podge...next year I think I will use matte.
Alice loved this so much that now every time we paint, she wants to paint with her hands and feet! I hope your little one enjoys this fun craft, too!
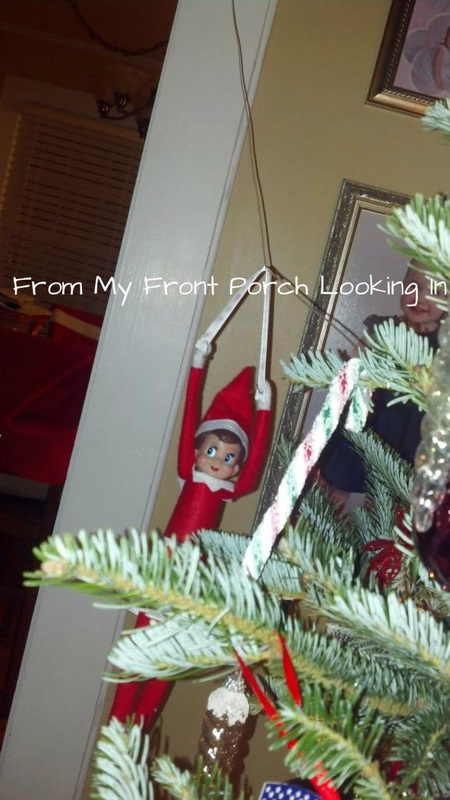
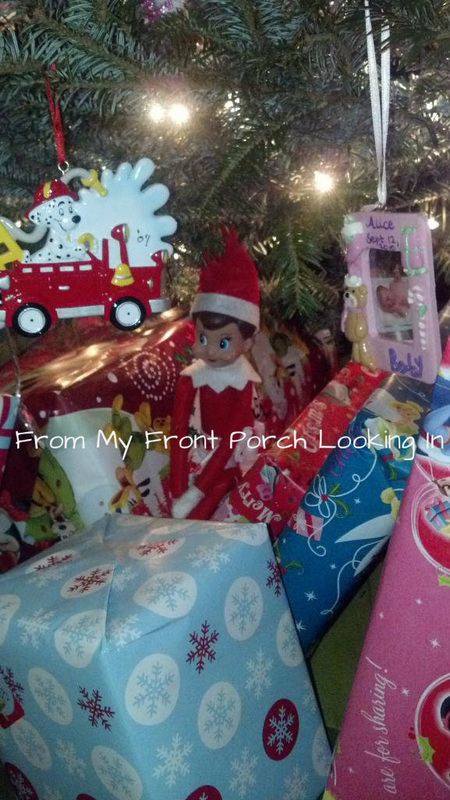
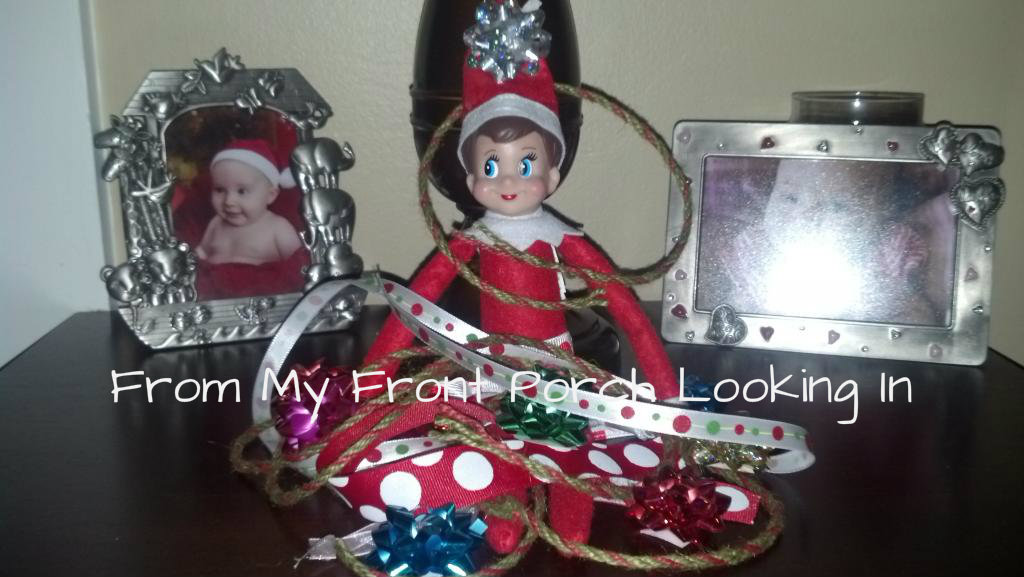
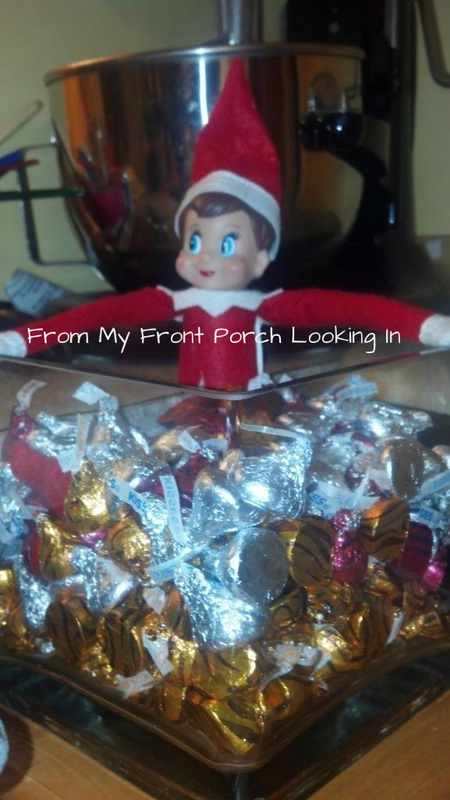
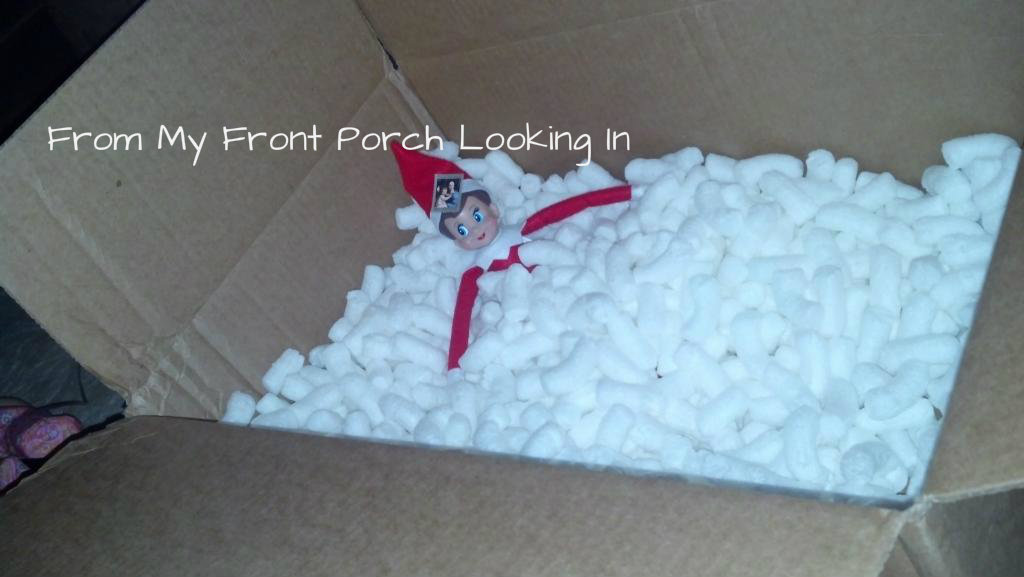
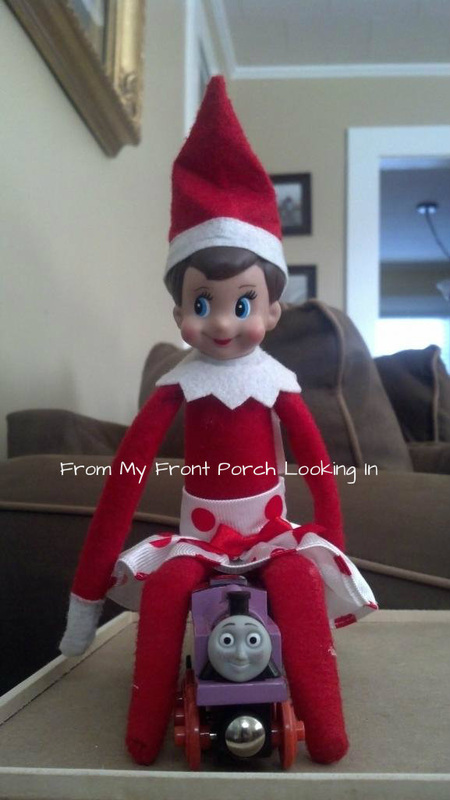
 You've seen it on Pinterest. You've seen it on Facebook. You've seen it in Barnes and Noble. You've probably even seen it in Target. The Elf on the Shelf. That little person that gets away with things that we would never allow our children to do. Well, last Christmas, our family adopted our own elf on November 27th. It seemed like the best time since Alice was now 2 and beginning to understand the holiday (and her behavior) a little more. Several folks told me, "Your elf is supposed to come the DAY AFTER THANKSGIVING!" Well...to you I say, I guess it's a good thing 2 year olds don't know the difference between one day and one week.)
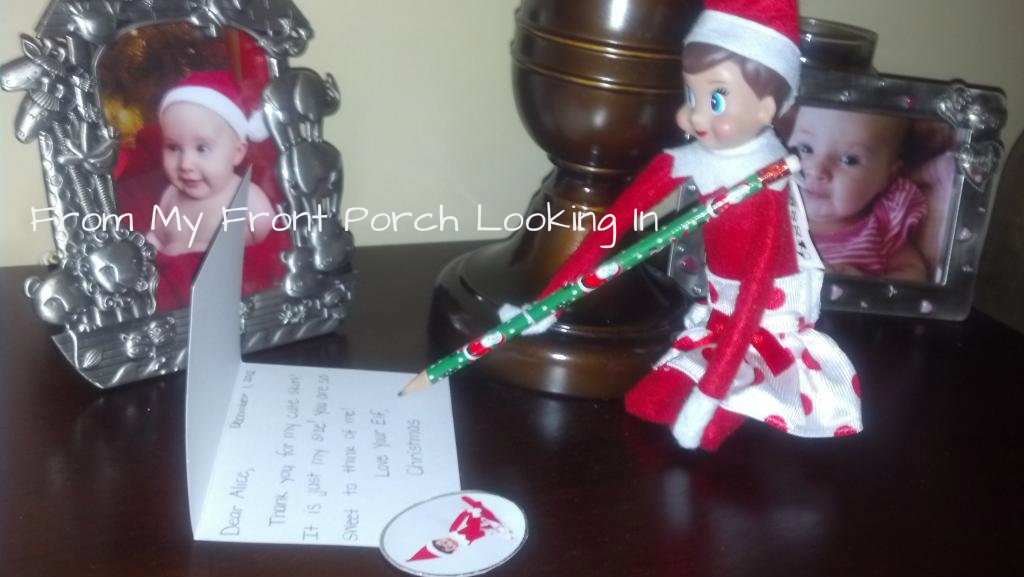
After opening her up and beginning the story, Alice decided to name our elf Christmas. (Oh so original, I know...but hey, at least she didn't name her Scout! And if you don't have your own EotS, you have no idea why that means anything!) We also made a few other decisions about our elf: 1.) Santa thinks it is okay for children to love on their elf and play with them on their first night and last night with the family, 2.) our elf would travel with us (we had planned a weekend trip to go to the Polar Express and Christmas just had to join us!) and 3.) Our elf would not participate in naughty behavior. If the elf is supposed to be an eye watching over your child to make sure they are doing the right things, why is it okay for them to do things that are unacceptable? Christmas should be a role model elf for Alice. Plus, who wants to make a mess for show then have to clean it up?!?!
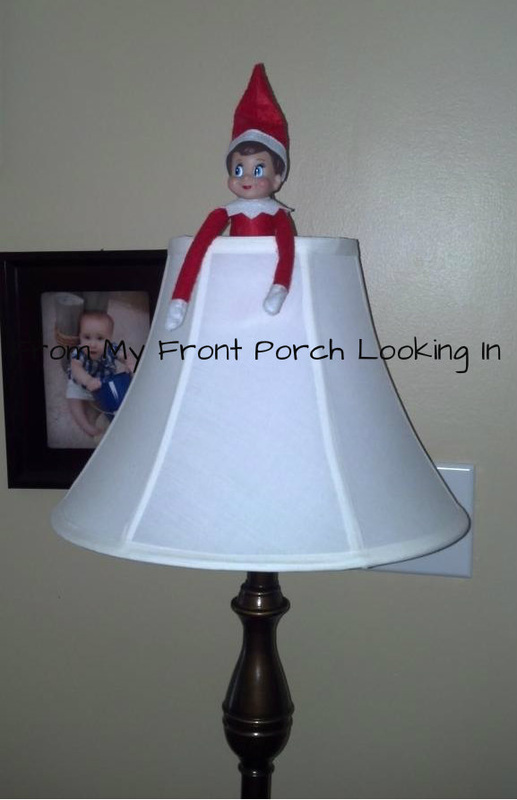
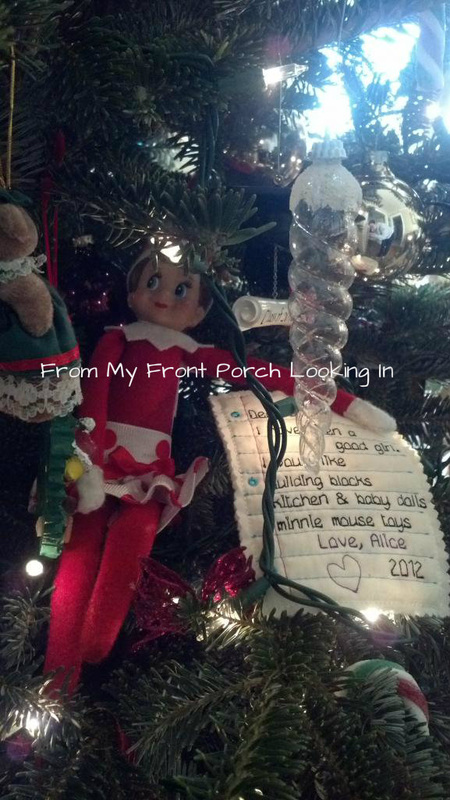
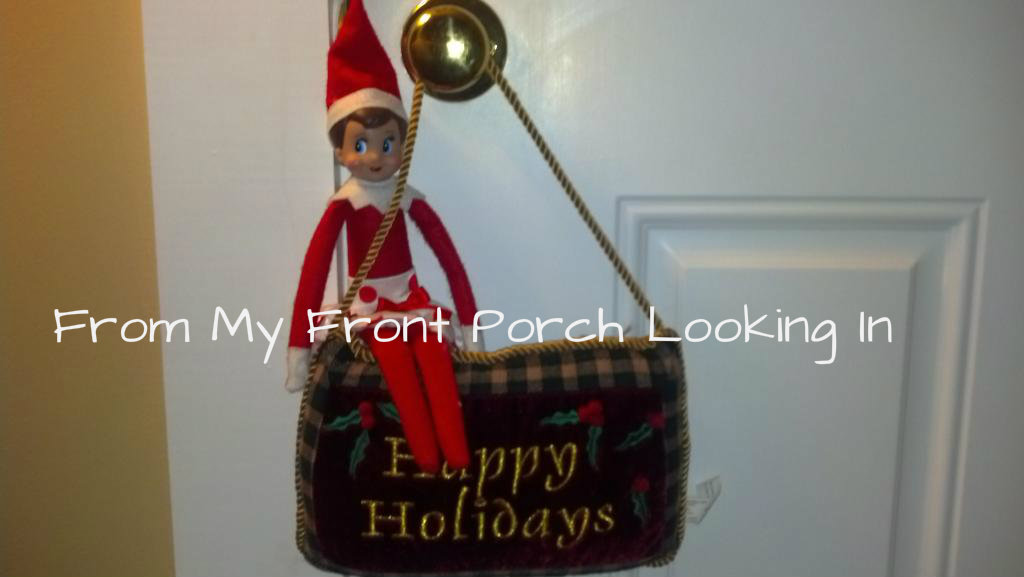
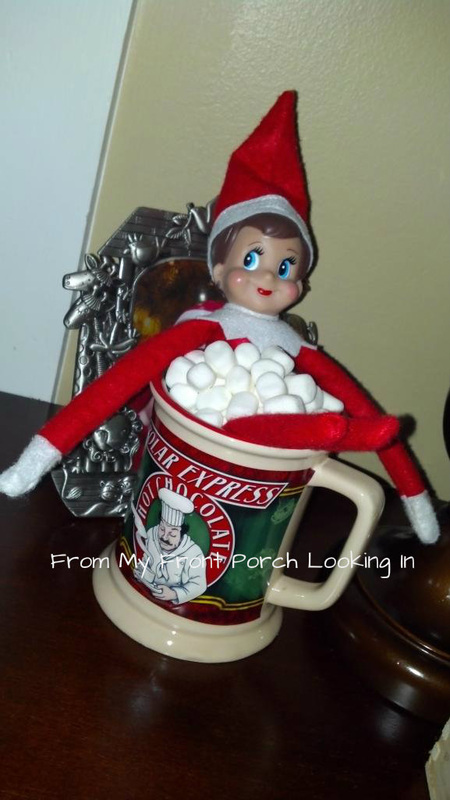
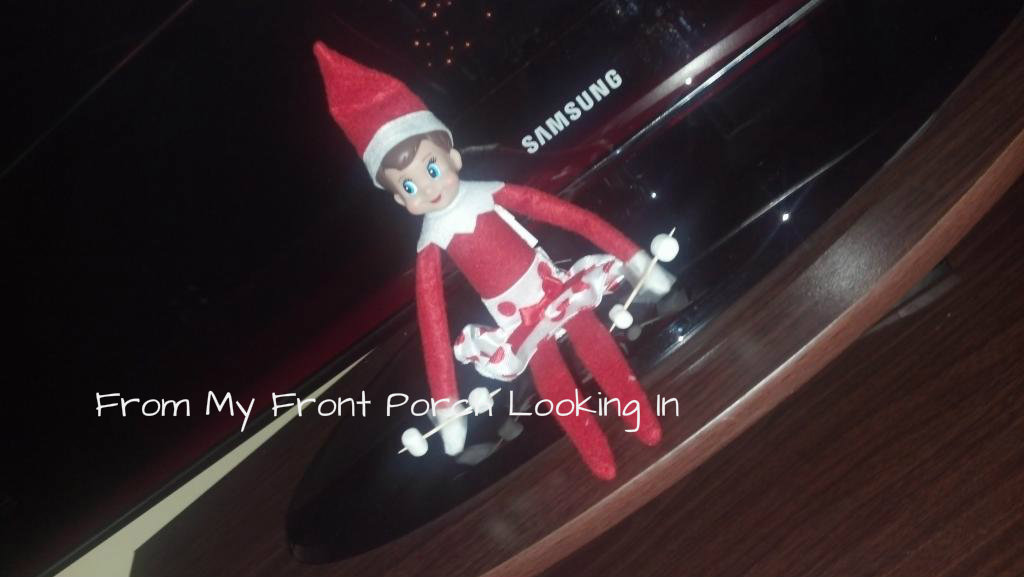
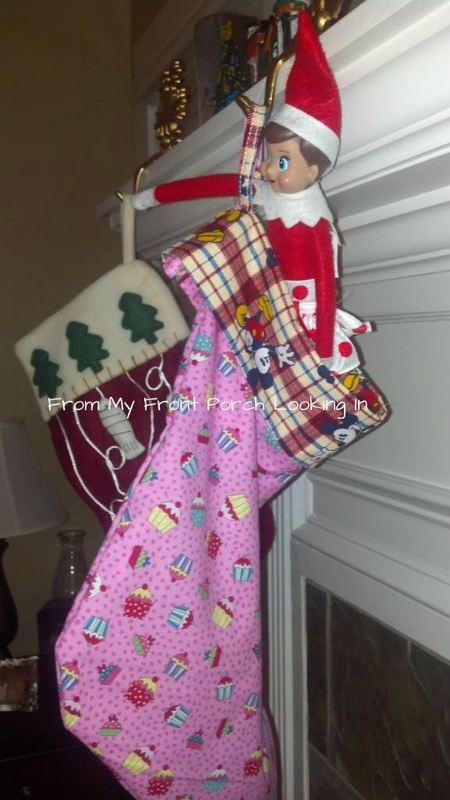
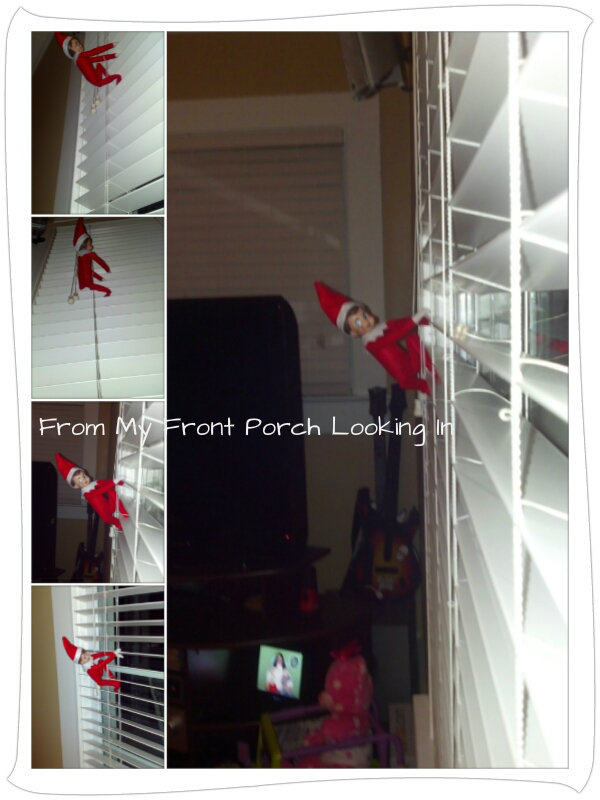
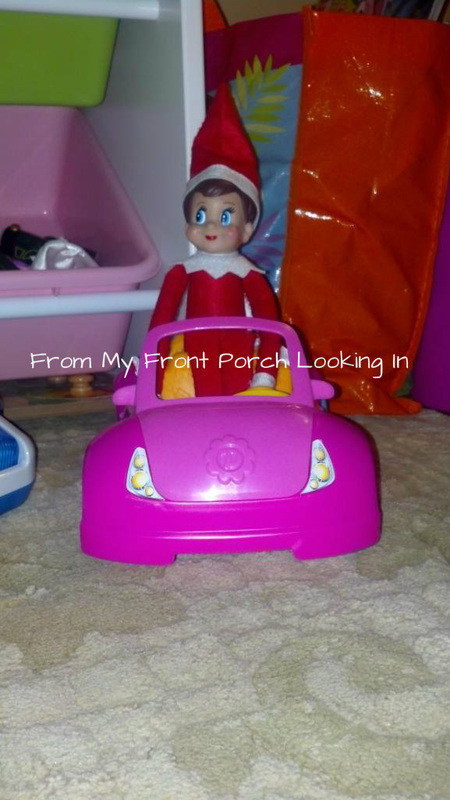
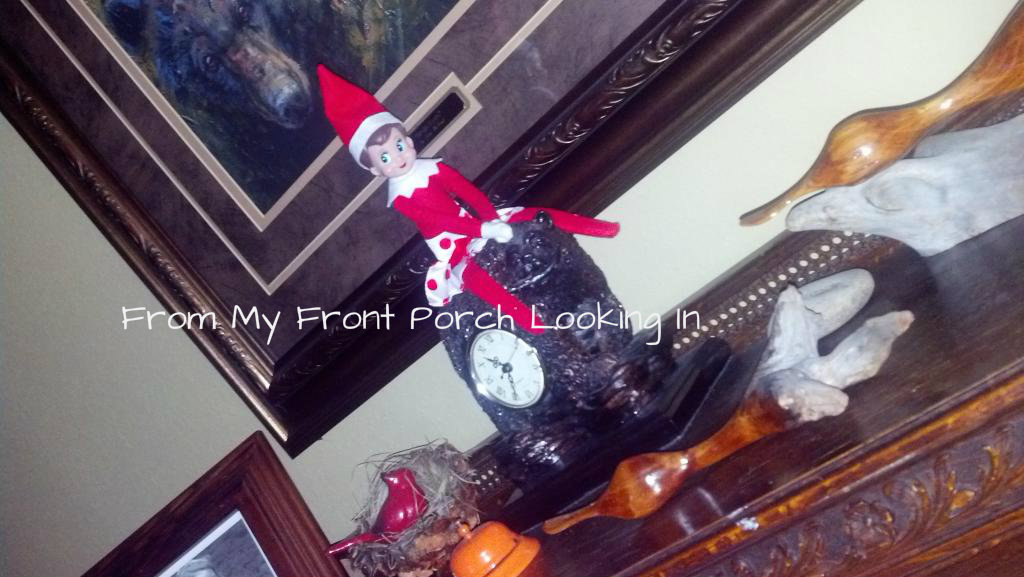
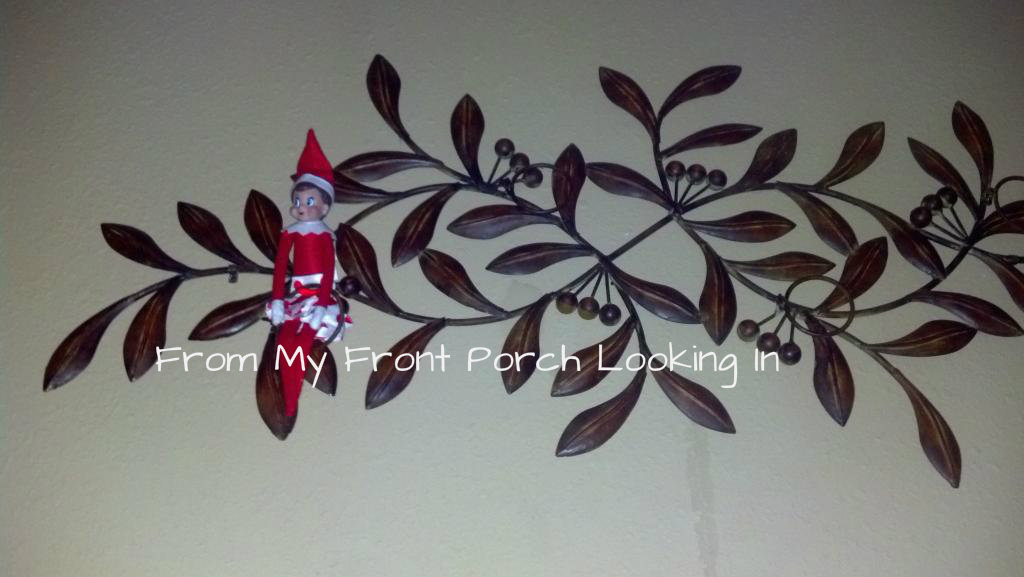
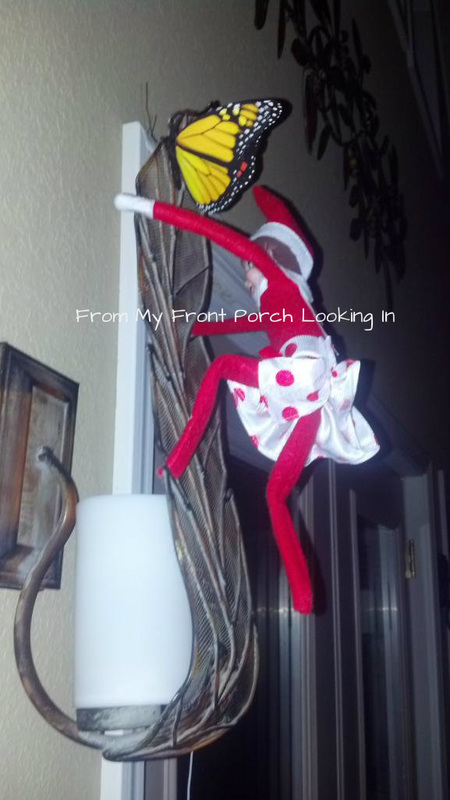
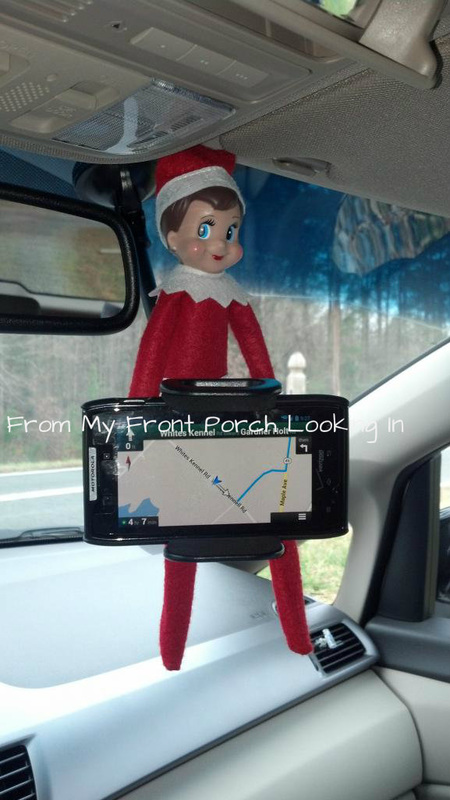
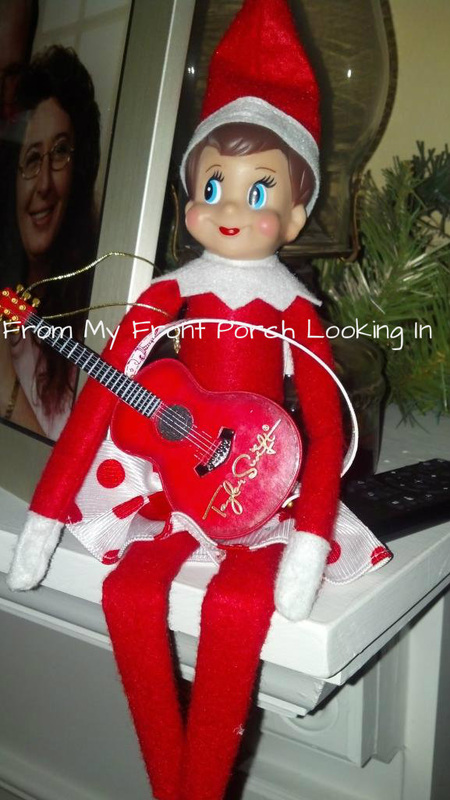
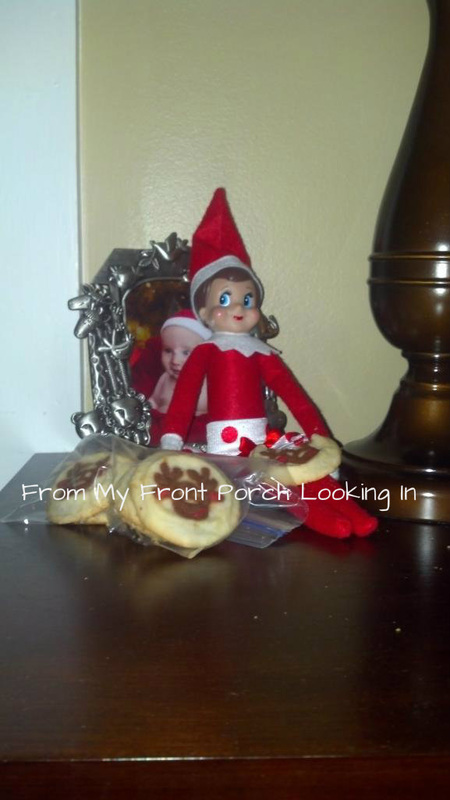
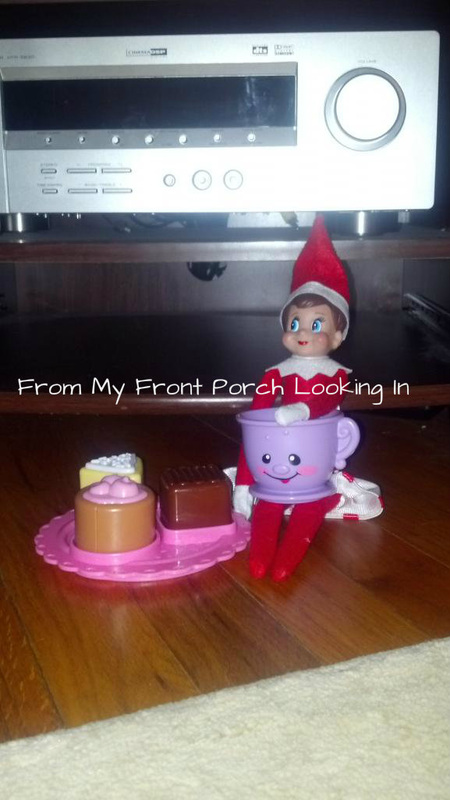
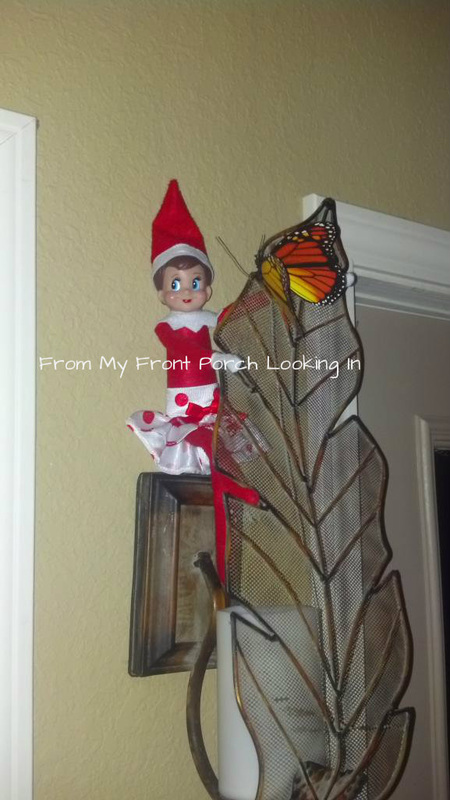
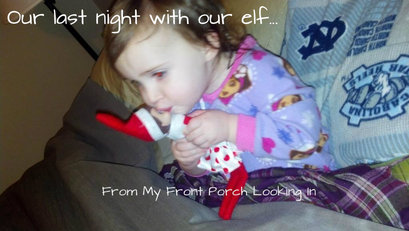
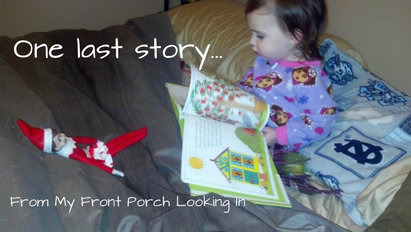
I will admit, some nights Christmas was in some really interesting places. And some nights she was in places that were nothing extraordinary to adults but were still fun places for Alice. Every morning, Alice would wake up and run through the house looking for Christmas. As soon as she found her, she would always say, "No touch her!" and hold her hands toward herself. It was truly adorable to see the magic of Christmas, both the season and the elf, growing in my daughter. On her last night with us, Alice was allowed to play with Christmas, hug her, give her kisses, and she even slept with Alice. Then when Alice woke up the day after Christmas, our friendly elf had made her trek back to the North Pole.
I turned to Pinterest for some ideas. I wanted to do as much on my own as I could...stubborn teacher in me, I guess. I have posted most of our photos from Christmas' visit below...maybe there are some ideas that you can use with your elf next year. I know I will be using all of the pins I have found...no more re-inventing (or attempting to re-invent) the elf wheel! If you have some awesome ideas, please share! Leave a comment with the idea or a link to your blog!
My mother in law loves to cook. So for Christmas last year, I decided to make her an apron. After a quick trip to the fabric store, Alice picked picnic cloth fabric with ants all over it.
I made each section separately, kind of eye-balling it as I went. The only part I actually created a template for was the bib. I added a large pocket in the center for holding things like ties, measuring spoons, a small towel, etc. The top just goes over the head- no tying. There is a tie around the waist.
I think it turned out cute!
 I love Christmas. I always have and I hope I always will. I love giving gifts to my friends and family. I love baking yummy goodies to pass out to friends, family, clients, coworkers, and employees. I love hosting my mom's family on Christmas night as we share in the blessing of this holiday together. There isn't much I don't love about Christmas. And this love has grown exponentially since having a child.
My first Christmas tree was a themed tree and while it was pretty, it just wasn't me. So in 2005 I started using various ornaments. That year I bought a bunch of cheap ornaments at the Dollar Tree but I have added sentimental ornaments since then. As a matter of fact, every year my family members get me an ornament for my tree and any time we travel, that is the one thing I buy when we stop in different towns. We have ornaments from the U.S. Treasury (it is actually a wreath made of shredded money), Hershey Park, Colonial Williamsburg, Tweetsie Railroad...just to name a very few.
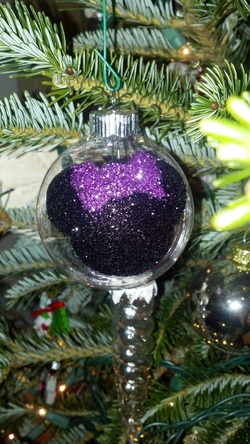
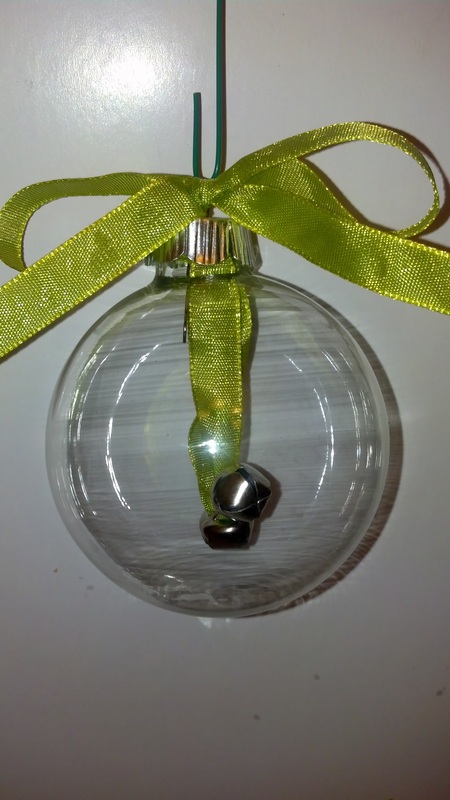
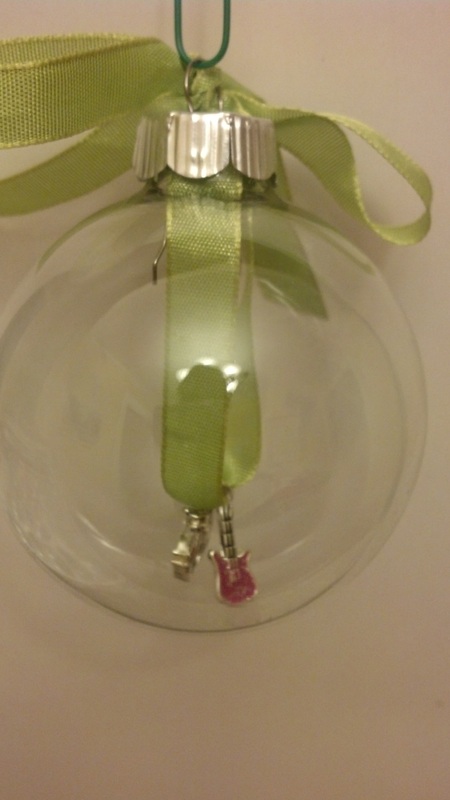
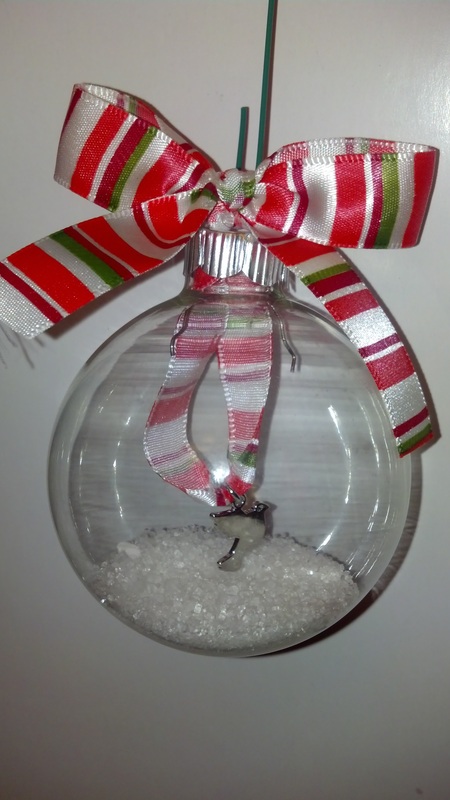
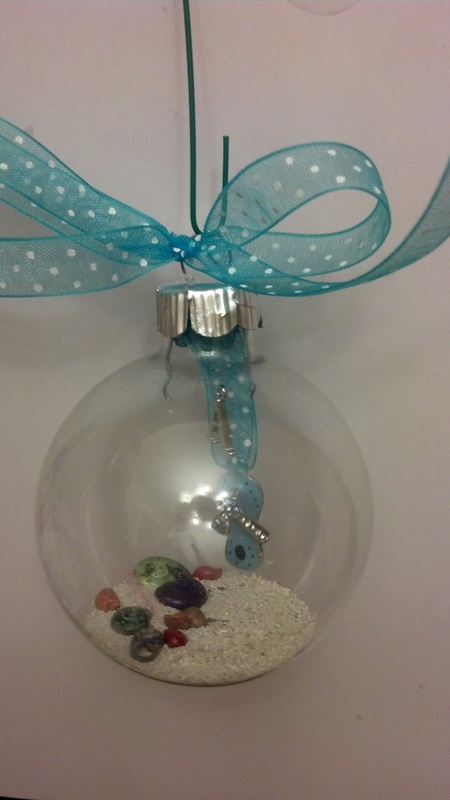
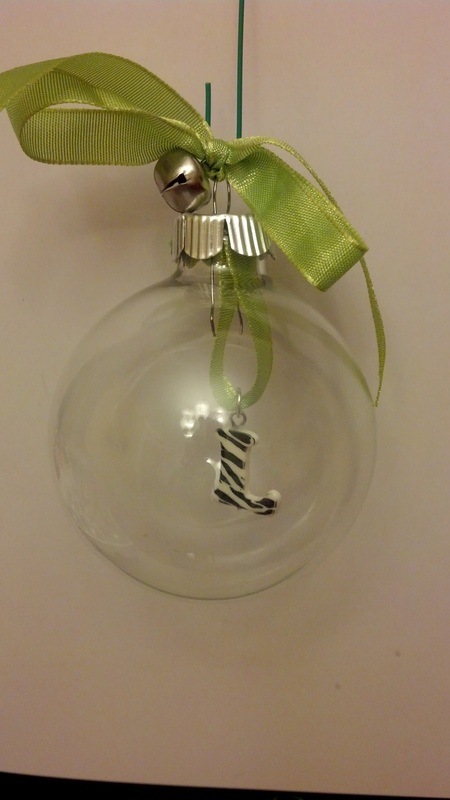
That being said, one of the special gifts I enjoy making to family and friends are ornaments. This year, I tried my hand at glass ornaments. I purchased several clear glass ornaments, various necklace charms (for Alice's ornament, I bought a guitar and drums to mark our trip to meet The Fresh Beat Band this year; for my teacher partner I used a flip flop and an "A" along with filling the ornament with sand from my wedding...just to name a few ideas), ribbon, and Epsom salt (which makes super great snow in ornaments!). At first, I tried to hot glue the ribbon to the top of the ornament so I could hang the charm from it. Well, that was disastrous! All I did was burn myself and make the ornament unable to close. After a few mess ups I realized I could just poke the metal hook THROUGH the ribbon...DUH! Oh my, how my fingers greatly appreciated that discovery!
The ornament to the right was a simple Minnie Mouse ornament I made for Alice using Mod Podge and glitter...that is all! Using a q-tip, I applied the Mod Podge in the shape of Minnie's head WITHOUT the bow. I added the black glitter and let it dry for a couple of hours. Then I applied Mod Podge in the shape of Minnie's hairbow...or he-bew as Alice calls it...and added the pink glitter. She was THRILLED over this ornament! Below you will see just a few other ornaments that I made this year. Hover your mouse over them to see more of a description.
Another cool ornament that I helped make last year was the "I Spy" ornaments that I did with the children on our Polar Express trip. I bought a bunch of clear PLASTIC ornaments, tons and tons of BABY DOLL items, such as tools, vegetables, sodas, books, etc., and of course, Epsom salt. Each child picked their own items to include inside their ornament. Once they put their items in, we used a funnel to fill the ornament with "snow". Super cute and wonderfully kid proof! We had children from 2-5 doing this on our trip with ease. Unfortunately, I cannot find my photos of this right now, but I promise I will keep looking and as soon as I find it, I will post it.
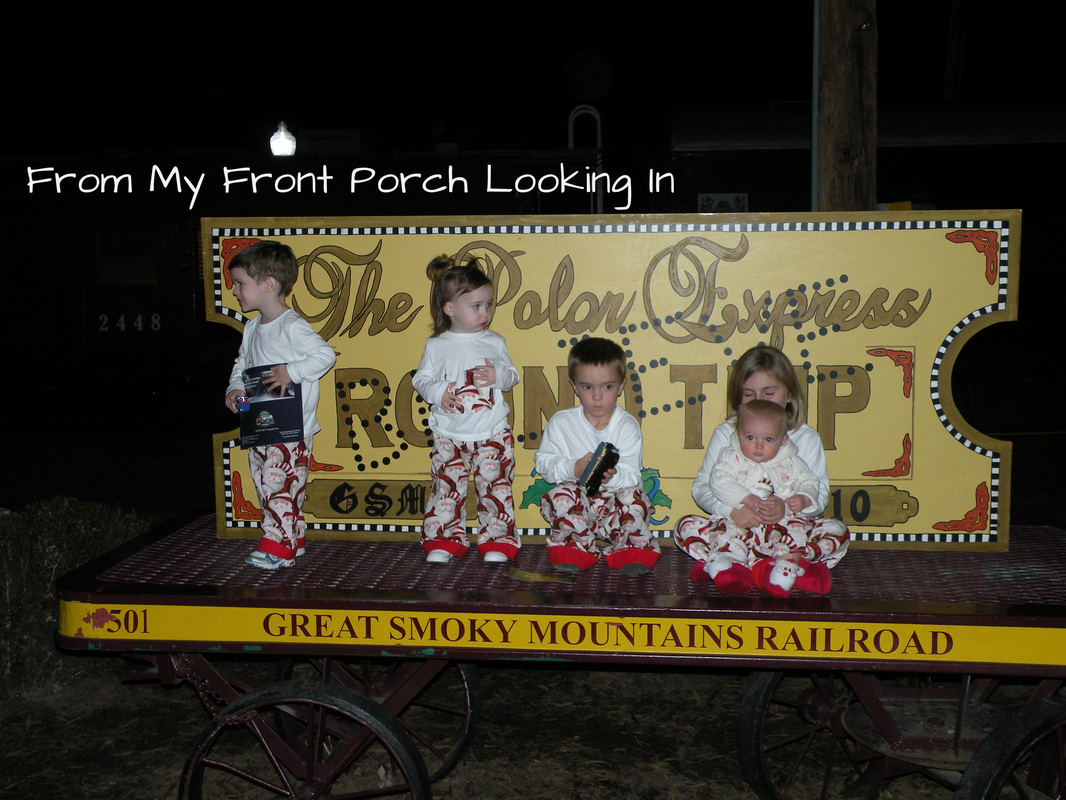
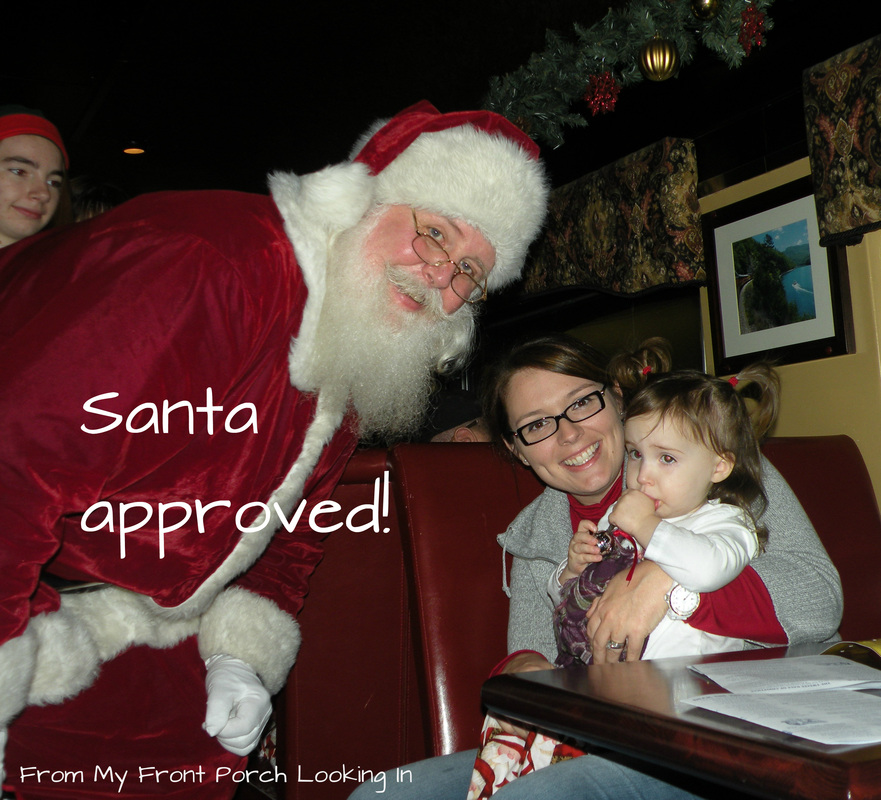
 This year, my husband and I were really excited about Christmas. It was technically Alice's third Christmas and it was the first Christmas that she would really be into opening gifts. We had decided to take her to ride the Polar Express in the mountains of North Carolina. After talking to my sister in law and some friends, we all decided to rent a cabin so everyone could go. In all we had 6 adults and 5 children. (Poor Alice is the only one without a sibling...maybe 2013 will change that!)
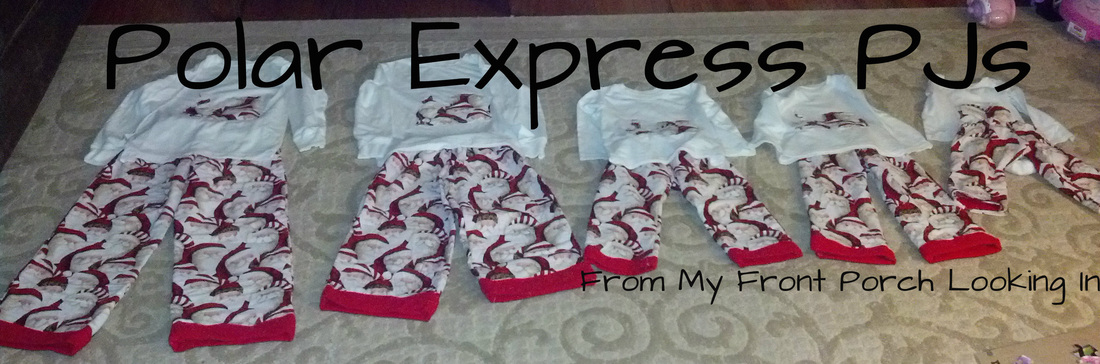
I wanted to do something special for the kids. I knew that the best part about the Polar Express train ride was wearing your pjs...oh, and meeting Santa. At first I looked for matching pajamas to buy then I thought, "Why buy when I can sew!" The next time I get that thought, I hope someone smacks some sense into me! While it was so fun getting it all done for the kids and it was just precious to see them in their matching pajamas, it was a ton of work! (Of course, I know I would do it again in a heartbeat!)
I drew my own "template" based on the sizing measurements for each kid. Because we were going to the mountains, I made the pants with a flannel lining. Each pair had a cuffed leg. The shirts were made using the same train template, just shrunken down based on the shirt size. I cut out the train using the same fabric that was used for the pants so they would be a matching set. I used interfacing on the shirts.
When it was all said and done, it took me about three weeks to complete all 5 sets. These were the first big project I made (other than curtains) and I learned a lot about sewing while making them. Now I feel like a semi-pro...especially when they didn't fall apart in the wash!
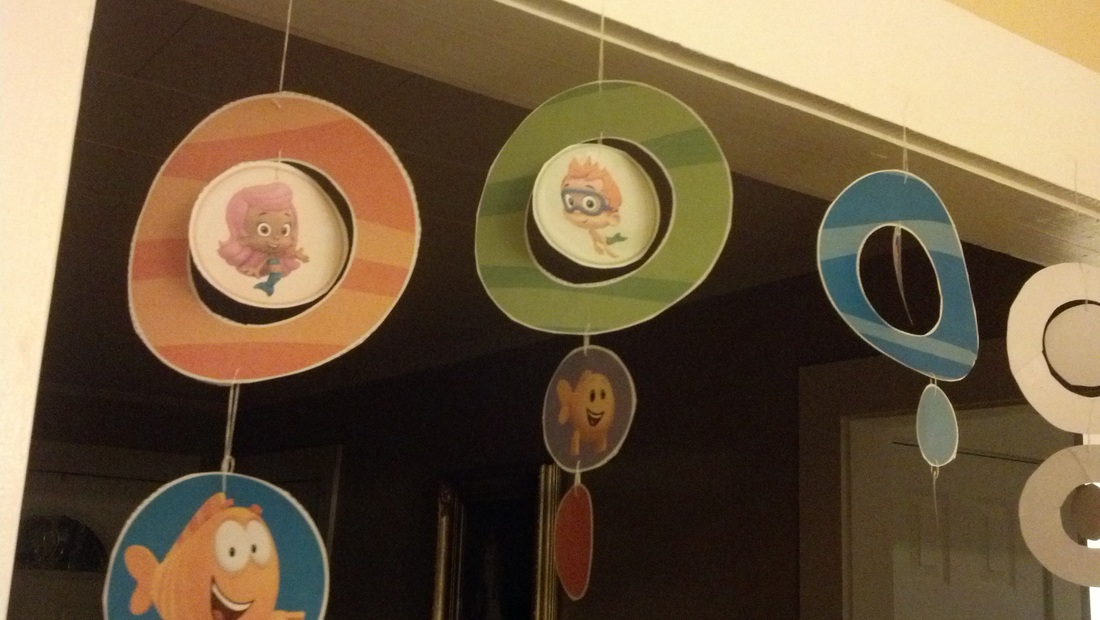
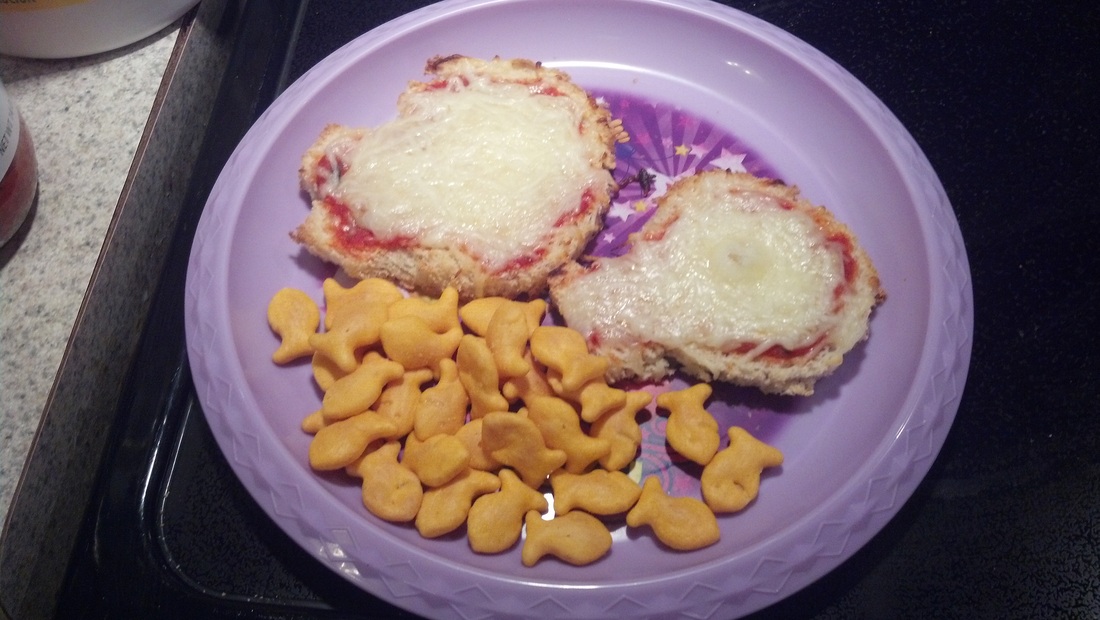
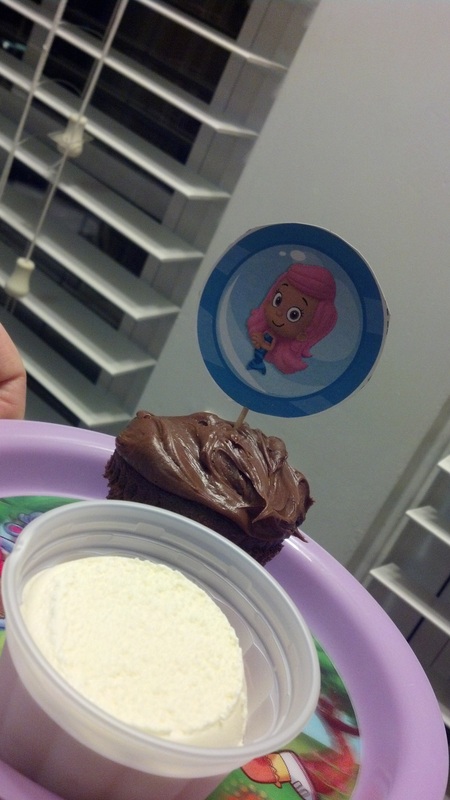
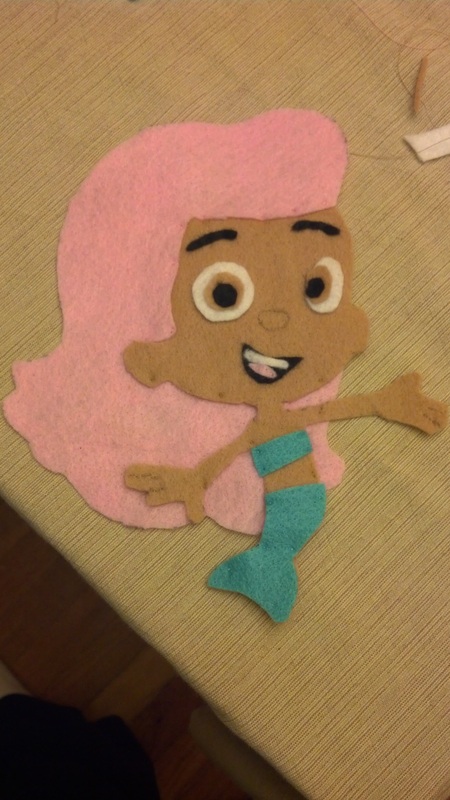
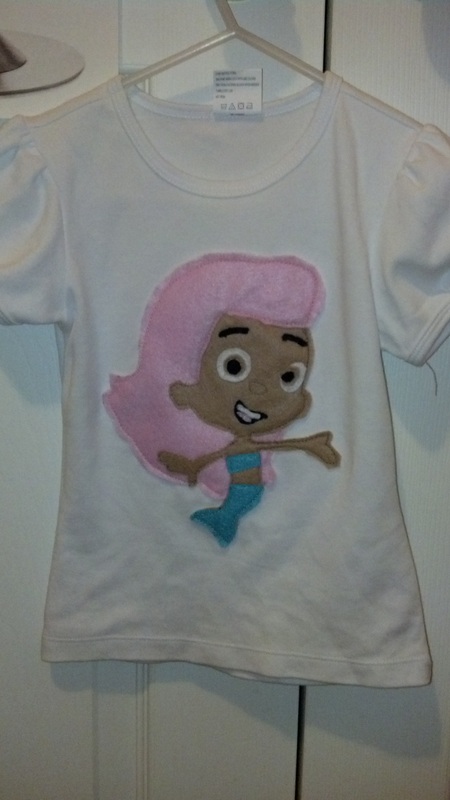
My sweet girl has been a fan of Nickelodeon Nick Jr's "Bubble Guppies" for quite some time. However, recently, it has become somewhat of an obsession for her. She loves this show! It is so funny to have conversations with her when she randomly throws in a comment about Molly, Gil, Deema, Oona, Nonny, Goby, and even Mr. Grouper! She had been going on and on about wanting a "Guppies party" for days. I thought she was talking about her birthday party (which is 9 months away) so I was like, "Okay, honey...if you want a Bubble Guppies party, that's what we'll have." Well, little did I know she meant NOW! My best response was, "If you are good at Nene's tomorrow, we will have our own Bubble Guppies party." Can I just tell you, she woke up at 3:30 AM and would NOT go back to sleep! I guess she thought the earlier she got up the faster she could get through the day! Her favorite female character on the show is Molly. So, when I picked her up from daycare after work, we went to Hobby Lobby and bought a white t-shirt and all of the colors of felt needed to recreate Molly. Then we went home and printed tons of fun stuff from the Nick Jr. website (typically used for birthday parties)...things like decorations, party hats, and cupcake toppers. We made "Guppies pizzas" served with Goldfish. We also made cupcakes together. We enjoyed all of this in our living room floor...our "picnic" area as Alice calls it, while watching our very own Bubble Guppies marathon (THANK YOU LORD FOR DVR!). The following day, I set to work creating Alice's very own Molly t-shirt. I printed a large picture of her and used it as a template. Then I had to hand sew many of the parts together. Once she was together, I was able to use interfacing on both Molly and the shirt. After about 10 minutes of machine sewing, the shirt was done and Alice was ECSTATIC! She was the talk of the daycare that Monday! Since she loved the Molly shirt so much, I decided to make her a second shirt by recycling an old onesie that my mom had gotten her and she had since grown out of. I cut the design out, gave it a felt backing with interfacing and simply sewed it onto a t-shirt. SO EASY! And once again, Alice was tickled! My next Bubble Guppies project will probably be a comforter for her bed...maybe that will encourage her to sleep in her own room! Agh!
|


 RSS Feed